Showing posts with label Soldier. Show all posts

Friday, March 15, 2013

Geth Juggernaut: First Impressions

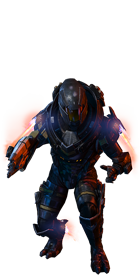
Welcome everyone to another first impression guide. Today we will be looking at the Geth Juggernaut. I'm just going to start by saying that the Juggernaut is a support character. I know everyone was looking forward to playing as a Geth Prime and laying waste to the battlefield with your Siege Pulse and Geth Spitfire, but it doesn't work that way.

For one, the Pissfire is garbage compared to the Geth Spitfire of the singleplayer. Take a look at the Mass Effect Wiki and compare the two. As you can see, the multiplayer version is vastly inferior to the singleplayer version in virtually every way except for the ability to refill ammo. Recently there was a small buff, but it only lives up to its ultra-rare status on a few characters with massive weapon buffs. In other words, not the Juggernaut.

Then, consider the Juggernaut's lack of mobility. Even with an Adrenaline Module III, you're not very mobile. You can't take cover and your massive shield strength only goes so far when you're a walking hitbox. As a result, this character is most effective in (or at least is forced into) a defensive support role, such as during objective waves.

Onto powers! Siege Pulse can be specced passively as damage reduction or as an active power for dealing damage. You can also choose between a crowd control approach or direct damage. I don't know if evolution 6a is additive or multiplicative. If it's the latter, then it's a good choice. But right now I'm using evolution 6a because it means more damage reduction, greater chance of knockdown, and an extra shot in the chamber. Siege Pulse has a chance to knock down any unarmored enemy, even if they have their shields up (hint: that means Phantoms lie down). This is a great power for suppressing aggressive enemies like Phantoms and Dragoons. But just like all Biotic Orb-like powers, its performance is affected by network speed. Off host, you will likely experience an added delay between shots.

A reincarnation of the Geth Shields from the first Mass Effect, the Hex Shield can be specced as an area of effect power or as a defensive power. The top row in particular works well in close quarters, which you will often be forced into because of your lack of mobility. However, I find that on higher difficulties, the damage evolutions become more and more insignificant and the defensive evolutions become more and more useful. Nevertheless, it stuns humanoid enemies that pass through it and the pulse it emits when cast offers some crowd control.

Mostly, it is great as portable cover, giving you and your teammates a right-hand advantage anywhere. Also, it's great for blocking Atlas missiles, Banshee warps, Geth Prime pulse blasts, etc.. You see a projectile streaking toward your face? Pop up your Hex Shield and you're good. Note that your shield blocks your teammates' shots as well as your own, so be considerate when you place it.

The Geth Turret is most useful for keeping up your shield gate, since you are a walking hitbox and constantly having your shields chipped away. Depending on how many points you have available, you can put in a lot of points or just skip it, since your heavy melee restores shields as well. I find rank 5b restore range to be useful for restoring teammates' shields in a wide area, while rank 6b is not as essential. If you're not on cooldown take a second to pop up a Geth Turret near you and your teammates, preferably in a place where it won't get shot down. Your team will thank you.

The Juggernaut has excellent weapon passives (added stability and ammo capacity) that are tailored to weapons like the Spitfire and Typhoon. Great if you're using a weapons build. However, it's nothing special for a caster build, except for the weight capacity. Even then, that's more of a weapon-related perk than a power-related one. So if you're not planning on using weapons very often, it may not even be worth spending points here; it would be better to max out your powers. Either way, the Juggernaut is not exactly an offensive powerhouse.

Finally, your Fitness power can make you a walking tank, but at the cost of reducing the damage you deal. You can recharge your shields by using your heavy melee to drain the energy from your enemies. However, enemies are not always within melee range. I recommend taking shield recharge to jump-start your shields -- durability is basically the only strength of this character. That and being immune to sync-kills. In fact, you're the one doing the sync-killing this time. Phantoms are particularly fun to grab.

Now, I've seen a lot of Juggernaut users running around sync-killing everything. What these young bloods need to understand is that it's not an efficient or effective way to play. Your heavy melee is not an offensive power, it is another support capability. When your team gets swarmed by a group of Phantoms, don't just grab one and zap her while your teammates get sliced up. Pick one up and drop her, then pick up another. Incapacitate them first and make it easier for you and your teammates to finish them off. Draw aggressive enemies such as Banshees and Phantoms away from your teammates. You have the durability and sync-kill immunity to keep them off your teammates backs.

To be continued...

-Grun7mas7er

Check out Megabeast's thread on BSN: How to play the Juggernaut effectively (by megabeast37215)

Also check out this video guide by Caineghis with commentary by Megabeast.

Wednesday, January 9, 2013

Vorcha Soldier: 200 Waves Edition

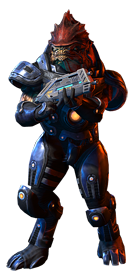
Greetings, fellow Mass Effect enthusiasts. Today I would like to present another edition of my 200 Waves guides, the awesome interchangeable Vorcha! To be honest, I actually did my 200 waves with the Vorcha Sentinel for various reasons, but I used a build that can be done exactly the same with the Soldier. I prefer this build on the Soldier rather than the Sentinel because Carnage has proven too slow in my experiments with it, and so it's an easy power to skip over. So without further ado, the build:

Vorcha Soldier
Bloodlust: 4-health regeneration, 5-weapon damage, 6-health regeneration
Flamer: 4-damage, 5-damage, 6-armor damage
Carnage: N/A
Vorcha Resilience: 4-damage & capacity, 5-power damage, 6-weapon damage
Fitness: 4-durability, 5-shield recharge, 6-fitness expert

Yeah, I know. "Reegar and Flamer are for scrubs" blah blah blah. Well I'm of the opinion that when Bioware gave us the Vorcha and Reegar in the same DLC they were aware of the synergy between them. Why not admit to this synergy and use it to your advantage?

For your ammo power, both Incendiary and Armor-Piercing mods work well on the Reegar, compensating for its weakness against armor (if you plan on using AP rounds, you can take off the high-velocity barrel). You can even use Cryo to mix it up, but it's more useful for supporting your team than actually dealing damage. The Reegar tends to panic smaller enemies anyway, so freezing them is almost redundant. Also, if you're using the High-Velocity Barrel, you don't need the armor-weakening as much, though your teammates can still benefit from it. The most useful part, in my opinion, is the slowing effect. Say there's a Brute in front of you. Hit him with Cryo ammo and flame him while backing away. You can get more burning damage done before you have to dodge if he's slowed down. Don't use Disruptor or Phasic ammo on the Reegar, it's utterly redundant.

As far as weapon synergy goes, I think the Reegar is the best choice. If you are boycotting the Reegar, which is understandable, then use a good infantry-killing weapon. Vorcha are scavengers, after all, and you have to be opportunistic. No really. Preying on the weak means quick kills. Quick kills keep your Bloodlust charged up, which in turn keeps you alive. The Claymore is good for one-shotting mooks. The Graal is also a classic on this character. I don't see people using the Piranha on this guy much, but it's more or less like the Reegar. Other than that, I've elected to take a sidearm for ranged combat if necessary. I had the misfortune of playing a game on Firebase Reactor and the enemies got stuck in one of the spawns above the map and I couldn't even throw rocks at them. It doesn't have to be powerful, just lightweight. If all goes well you'll never have to use it.

Bloodlust is the Vorcha's signature power and skipping it is blasphemous. As you can see, I take all health regeneration evolutions. The Vorcha isn't exactly tanky. He can't sit in front of a Cerberus Turret and laugh like a Kroguard can. That said, he has much greater endurance than the average character and can survive repeated close-quarters and close-call encounters. Improving your health regeneration lets you get back into the fight much faster -- almost immediately if you have Bloodlust charged up. And besides, if you're playing on higher difficulties, why would you take melee damage? Then I take weapon damage because this is primarily a weapons build and the stacking damage adds up quickly.

You have shielded enemies covered with the Reegar, but what about armored enemies? You have Flamer for that. I opted for all damage and then armor damage, which boosts your armor damage multiplier from 1.5x to 2.25x, meaning you'll do massive damage to armored targets with all your damage bonuses. You can opt for the range evolution if you prefer. There's a minor exploit/trick with the Reegar and Flamer. Not the one where you can fire both at once (Bioware patched that), but if you activate Flamer while firing the Reegar, you can use Flamer with normal walking speed, as apposed to being slowed to a crawl. The added mobility is useful.

Fire explosions are all well and good, but the thing is that Carnage recharges too slowly with Bloodlust on. I find it to be inefficient, but it can be done.

For Vorcha Resilience, I take all power damage to give Flamer a boost. The extra capacity helps a little too. Then I take weapon damage because cooldown is not too much of an issue for Flamer. You will be better served by the additional damage. For Fitness, I take the entire bottom row. The more health, the better. Though your shields are secondary, they still give you a shield gate, which can negate the greater part of massive damage attacks. On that note, don't waste a Cyclonic Modulator on the Vorcha. You'll be better served by a Power Amplifier, Adrenaline Module, or even Shield Power Cells.

That's really all there is to the build. Reegar for shields/barriers, Flamer for armor. Bring a teammate who can trigger Fire Explosions. Have fun with the build, stay tuned for more in the future. Enjoy the fireworks.

-Grun7mas7er

Saturday, January 5, 2013

Batarian Soldier: 200 Waves Edition

Greetings everyone, and welcome to another edition of my 200 Waves guides. Today is the Batarian Soldier, one of the old characters that still holds up to the new ones. It's not a new build, but it gets the job done. Then there's always the melee build, but now that we have the Broguard (Batarian Vanguard) it's redundant if not inferior. As such, I opted for the grenadier build.

Batarian Soldier
Ballistic Blades: 4-cone spread, 5-range, 6-explosive blades
Blade Armor: 3
Inferno grenade: 4-damage, 5-damage, 6-radius & shrapnel
Batarian Enforcer: 4-damage & capacity, 5-power damage, 6-damage & ammo
Fitness: 4-durability, 5-shield recharge

I recommend a medium weight, high-damage weapon for bosses, as this character can take on pretty much everything else from basic troopers to Phantoms just by using his powers. Such weapons include the Harrier, Piranha, Wraith, and Hurricane. Some weapons like the Raider, Claymore, Geth Plasma Shotgun, Graal, and Reegar work but are a little heavy. Consider replacing Blade Armor with rank 6 of Fitness if you want a better cooldown.

Your ammo mod really depends on what enemy you are facing, as you can't trigger your own tech explosions with this character (as far as I'm aware). He's excellent for priming fire explosions, though.

Blades and grenades: the meat and (hot) potatoes of this build. This combo will annihilate crowds, save for boss-level enemies. I spec Ballistic Blades for maximum crowd control. The important evolution is explosive blades, which lets you double-stagger enemies. This is very useful against Phantoms and such, allowing you to hit them with your Inferno Grenades. Basically, stun lock all the things.

The 25% DR from Blade Armor brings you to approximately 1600/1600. Cooldown isn't a big deal with this character, but you still don't want your Ballistic Blades to take too long. As I said, adjust your build to achieve a cooldown that meets your needs.

The grenadier playstyle of this build brings the Krogan Soldier to mind, and the strategy is similar. Use Inferno Grenades against groups of lesser enemies as well as armored targets. If you don't have a high-level grenade capacity mod, you may want to take extra grenades for evolution 5 instead. Otherwise, take all damage evolutions to deal massive damage over time. Evolution 6 is not prescriptive, I just prefer radius and shrapnel for better crowd control. You're more likely to get killstreak medals if you can hit more enemies at once. Try staggering an entire enemy spawn with Ballistic Blades and then lobbing an Inferno Grenade in the middle of them.

For Batarian Enforcer, I take all power damage bonuses and weapon damage, which is pretty typical for any caster/grenadier build. Finally, I take durability and shield recharge in Fitness. If you can deal with the longer cooldown, taking 3 ranks in Blade Armor for 25% DR is better than 30% health and shields. I find that 15% shield recharge delay is superior to and additional 5% DR from Blade Armor, though that is an option. Remember that shield recharge delay varies by difficulty, so this evolution is somewhat more useful on Platinum.

I think that's about it for the build. I know the Batarian Soldier is old, I'm a little late to the party, etc etc. Irrelevant, as long as some people get some use from this guide. Thanks for reading everyone. I know it's been a while since I've made a new post. I've mostly been editing old ones and perfecting some of the 200 Wave guides. Plus Bioware is on vacation so there's not much in the way of updates. I've been on vacation as well, as I'm sure many of you have, and so I'm just getting back to my day-to-day schedule. Anyway, I hope you all had a happy new year.

-Grun7mas7er

Also, check out RedJohn's Guide to the Batarian Soldier on BSN. He's sort of the resident Batarian Soldier expert. You should listen to him, not me.

Sunday, December 9, 2012

Krogan Soldier: 200 Waves Edition

Hello esteemed readers. So I'm trying out a new thing where I make "200 Waves Edition" guides for characters after completing the 200 wave challenge with them (or approximately that many waves if there is no such challenge for the character). This way I have a very solid understanding of the character and how to play them effectively. It takes a little longer but I think that it will improve the quality of these guides. I do play the characters before making the guides of course, usually pretty extensively, but this way I have a greater sense of experience with the individual characters that I didn't have before the challenges were introduced. And of course I will continue to update old builds as time permits.

Krogan Soldier (Fire Explosions build)
Fortification: 4-durability, 5-power synergy
Carnage: 4-damage, 5-incapacitate, 6-armor damage*
Inferno Grenade: 4-damage, 5-damage, 6-radius & shrapnel
Krogan Berserker: 4-damage & capacity, 5-power damage, 6-weapon damage
Rage: 3*

*Alternatively, put 3 in Carnage and max out Rage.

Recommended weapons:
ARs: Falcon, Harrier
Shotguns: Geth Plasma, Wraith, Graal, Reegar, Piranha

Recommended ammo bonus: Incendiary, Disruptor (especially if against Geth)

Now I'll explain the build because when I first saw it I was a little skeptical. It does look a little strange on paper (A Krogan without maxed Fitness? This is blasphemy!!!). But I assure you it is quite good in actual gameplay. First, let's look at Fortification. Evolution 4 is obvious because this is not a melee build. Evolution 5 is obvious too, since this is a grenadier build, and grenades benefit from power damage bonuses. What's not so obvious is why we choose 3 ranks of Rage over evolution 6 durability. It's all about the math.

Using an approximate DR formula (since the real one is complicated):

Health/Shields with 40% damage reduction, no Rage
1250/1667
Health/Shields with 30% DR, 3 ranks of Rage
1446/1929
Health/Shields with 40% DR, no Rage, Cyclonic Mod IV
1250/4167
Health/Shields with 30% DR, 3 ranks of Rage, Cyclonic Mod IV
1446/4071

As you can see, the Krogan Soldier is more durable with 3 ranks in Rage over rank 6 of Fortification in all cases. So do yourself a favor and take this advice. Whether or not you take a Cyclonic Mod is up to you.

Since it was buffed, Carnage is reasonably good. When you take Fortification power synergy into account, Carnage does massive damage to armored targets. It's still quite weak against shielded targets, however. It can also incapacitate unprotected mooks, such as Husks,  which is quite useful. But these powers are just bonuses. The main purpose of Carnage on this build will be to trigger fire explosions from your Inferno Grenades. With this combo, you will be able to annihilate spawn points and a well-thrown grenade will net you a killstreak medal.

Your Inferno Grenades are your bread and Carnage is your butter. With the appropriate damage bonuses, you can make an entire spawn zone go up in flames, killing all but the toughest of enemies with a single grenade. Thanks to its inherent armor damage bonus, even Brutes and Scions don't stand a chance. With the massive damage over time potential (nearly 670 dps with the above build), the last thing you want is for a Phantom, Banshee, or Praetorian to cancel that damage with their space magic bubble. Generally this means that you don't want to use Carnage on them until the damage over time has finished.

For Krogan Berserker, I took all power damage bonuses and weapon damage at the end. You'll have great weight capacity and decent weapon damage bonuses. This is primarily a power-based build though, despite it being a soldier (and a Krogan one at that). Rage has been explained above.

That's about it for this build. Try it out and if you like it, I encourage you to check the 'like' box below. If you really like it, feel free to subscribe to future builds. Thanks for reading.

-Grun7mas7er

Here's a video guide by Stardusk, which I found very helpful and inspiring.

Tuesday, December 4, 2012

First Impressions: Quarian Marksman Soldier

Quarian Marksman (locust headshot build) [kind of for teh lulz but also kind of serious]
Marksman: 4-firing rate, 5-headshots, 6-accuracy & firing rate
Tactical Scan: 4-weapon damage, 5-headshots, 6-damage
Sabotage: N/A
Quarian Defender: 4-weapon damage, 5-headshots, 6-weapon damage
Fitness: 4-durability, 5-shield recharge, 6-fitness expert

Recommended: AP Ammo, but others work too.

I'm currently in a discussion on BSN regarding the Quarian Marksman vs. the Turian Soldier. I'm looking for more interesting ways to play this character. I think Eric Fagnan, Lord of Nerfs and Buffs, commented on the QM's apparent Fitness deficiency and said that they will likely buff his offensive capabilities. I'm very interested to see what these balance changes will be, and whether or not they can successfully differentiate the character from the TS (to a greater degree, anyway). For now, I am running this build. I played a few quick games with the QM (Locust headshot build). It's not very creative admittedly, but hey, the character just came out today.

Stay tuned for future updates (and hopefully a more interesting QM build).

Update: Quarian Marksman weapon damage bonus for passive rank 1 increased from 2.5% to 7.5%. Weapon damage bonus from evolution 6b increased from 10% to 12.5%.

-MACave11i

Sunday, November 11, 2012

ME3 Character Guide: Geth Trooper Soldier

Hello everyone. Well I've been playing around with the Geth Trooper for Operation Blast Furnace, and I have to say, this platform is awesome. I can see why it was such a highly requested character. What strikes me the most is the flexibility of this build. I have heard of two popular builds: the Weapons Platform and the Flamer build. I will be covering the latter, and even then there are many possible sub-builds. For example, you can prioritize Flamer damage, melee damage, durability, speed, or a combination of all of those. As a result, I would recommend tailoring the build to suit your play style.

Geth Pyro (what I used for the challenge)
Flamer: 4-damage, 5-damage, 6-armor damage
Fortification: 4-durability, 5-power synergy, 6-durability
Hunter Mode: 4-power recharge, 5-power damage, 6-damage
Network AI: 4-damage & capacity, 5-power damage
Advanced Hardware: 3

I want to note that this is not the Flamer build, this is a Flamer build. I focused primarily on damage for my evolutions and used equipment to compensate for durability. Typically I would go over why I chose each evolution, but the Flamer build is very versatile. I believe that the only way that you can go wrong with this build is by neglecting durability. I tried a Gold PuG where I had nothing but Fortification in terms of durability (I was a level 16 or something and I didn't have all my evolutions filled out) and I was constantly getting dropped like a fly. Eventually I had to turn off Hunter Mode for the rest of the game. So don't do what I did. It's not fun.

Let's take a look at Flamer. You have a choice between damage and reach for evolution 4. Both are good, but I'm leaning towards reach for the simple fact that it increases your range to 15m, which is incredible. It lets you stay back a little more while you toast your enemies, indirectly improving your survivability. For evolution 5, I always take damage because I rarely exhaust Flamer's default duration. There's really no need to increase the duration unless you want to make an Ironman-esque tank that shoots flames everywhere for no reason other than for the spectacle. Finally, evolution 6 is a choice between shield and armor damage. This is also subject to preference. I like to carry a Reegar or Acolyte with this build, so I always go for armor damage, which results in extremely good reduction of all enemy defenses. However, Flamer already has an inherent 50% damage bonus against armor, so taking shield damage evens it out, making Flamer effective against all types of defenses. I would take shield damage if you want to carry a weapon without a shield damage multiplier or Disruptor rounds.

Fortification is fairly straightforward in terms of evolutions. For the Flamer build, you want to go with all durability and power synergy. One thing that you may want to consider, depending on your build, is evolution 6 of Fortification vs. 3 ranks of Advanced Hardware. Fortification 6b gives you an additional 10% damage reduction (effectively about 10% bonus health and shields), while 3 ranks in Advanced Hardware gives you 25% bonus to health and shields. The difference is that Advanced Hardware is derived from your base health and shields (250/1000), while Fortification is derived from your max shields and health -- including any gear and equipment you might have. Thus, a Geth with maxed Fortification and a Cyclonic Modulator is a walking tank. Without a Cyclonic Modulator... not so much.

I think Hunter Mode is entirely optional for this build. For example, depending on your play style, you might opt for maxed Advanced Hardware and a Power Amp rather than Hunter Mode and a Cyclonic Modulator. This also depends on your weapon of choice. If your weapon gets reasonable benefits from Hunter Mode then take it. If you want to use just a Reegar, though, then don't bother with the accuracy and rate of fire bonuses. There's also the movement speed bonus to consider. I find it pretty useful since you have to be able to get in close as well as make a quick getaway.

Networked AI is a simple choice between weapon damage and power damage, which will be completely up to you and your play style. Also, you might want to consider choosing between rank 6 weapon damage or 3 ranks of Advanced Hardware. Again, this depends on what equipment you will be using. A Cyclonic Modulator can more than compensate for lack of durability, so weapon-dependent classes can take weapon damage instead of fitness. I like to use my stockpile of Power Amps, so I take the three ranks of Advanced Hardware and shield-boosting gear to compensate for lack of durability.

In general, I recommend having at least 1500 shields so you'll have 1000 to spare when using Hunter Mode. Along with maxed Fortification, you'll have 1667 effective shields.
An approximate damage reduction formula (not the real formula):
Max Shields x 1/(1-damage reduction)
ex. 1000 x 1/(1-0.40) = 1000/0.60 = 1666.6
On Platinum though, I recommend using a Cyclonic Modulator IV, which gives you incredible durability. For example, if you have a build like this you'll have just over 2000 shields with HM on, along with 40% damage reduction, effectively boosting your shield strength to 3417 (2050/0.60 = 3416.6). With most characters, damage output trumps durability. However, since the Flamer forces you to move slowly and be at relatively close range, durability is a requirement for effective use of this build.

So I hope that this guide was helpful to your understanding of the Geth Trooper. Thanks for reading, everyone, and have fun with the build. Take care.

-Grun7mas7er

Here is a video guide to the Geth Trooper by Lord Stardusk. Enjoy.

Thursday, October 11, 2012

Turian Havoc Soldier: 200 Waves Edition + Stim Pack Discussion

Greetings everyone. This is an updated Turian Havoc Soldier guide as well as something of a response to the Stimulant Pack nerf that happened a while ago. What happened was Bioware heard the cries of some members of the community that the Turian Ghost Infiltrator was overpowered. One source of this power was Stimulant Pack, which made him essentially invincible while dealing extra-insane amounts of damage. Why Bioware gave the Turian Ghost Stim Packs but not the Turian Saboteur is beyond me. Just that simple switch would make the TGI less powerful while giving the Saboteur a fair shot, but I'll try not to cry over spilled milk.

The balance changes were:
Simulant Pack Power
- base damage bonus decreased from 10% to 5%
- base max shield bonus decreased from 2000 to 1200
- evolution 5 weapon damage bonus decreased from 10% to 8%

Havoc Strike Power
- base cooldown reduced from 10 seconds to 8 seconds
- base damage increased from 500 to 600

So Stim Pack got nerfed which did weaken the Ghost, if only slightly, while neutering the Havoc to a much greater extent. Why? Because the Ghost has Tactical Cloak, giving him a brief 100% damage bonus for assault rifles. Do you think a 7% damage reduction to his assault rifle makes much of a difference? To compensate for the collateral damage to the Havoc, Bioware buffed Havoc Strike to a level that it probably should have been at on launch. At the end of the day the Havoc loses a potential 1600 shields from Stim Pack, which gives him the considerable durability necessary to use Havoc Strike in the first place. The Ghost, however, can still use Tactical Cloak and Stim Pack to get away from any situation unscathed more or less the same as before.

To wrap up this rant, I propose that Bioware improve the viability of Havoc Strike by doing one or both of the following: a) rebuff Stim Pack, b) buff Havoc Strike base damage & force. My vision is a Havoc that can use both Cryo Blast and Havoc Strike for massive damage bonuses and Stim Pack for survivability, plus a slight damage bonus for the cherry on top. Havoc Strike should have enough damage and force to take the Incendiary Strike evolution and still rival Biotic Charge. The player would be able to use a 6/6/6/4/4 build, having both decent passive damage and shields. However, the greatness of the build would be in the active powers.

For now, I'm using a pretty generic and non-dynamic build. Nevertheless, it's a good one and definitely Platinum worthy, if a little boring.

Turian Havoc
Stimulant Pack: 4-max shields, 5-pack capacity, 6-survival
Cryo Blast: 4-radius, 5-cryo explosion, 6-frozen vulnerability
Havoc Strike: N/A
Armiger Legion: 4-damage & stability, 5-headshots, 6-damage & stability
Fitness: 4-durabilty, 5-shield recharge, 6-fitness expert

I recommend using AP ammo with this setup. It's just the best for dealing with armored targets. Accept no substitutes!

For weapons, this guy is great with just about anything (Turian passives yo!). The reason I take the Harrier is that it has great all-around specs. It's accurate and has great DPS. It's recoil is mitigated by your stability bonuses. Then I take the Talon for shield-stripping duty and as a sidearm in case I run out of Harrier ammo. Sure you could take the Acolyte, but it's slower and not as good in general combat. It's a tradeoff. The Talon with the magazine upgrade is sort of like the new Piranha (though nothing could ever really replace our beloved Piranha). I've generally used the Talon as a lightweight weapon with decent damage, so it's cool to have a chance to use it more like an actual shotgun.

Stimulant Pack: the hallmark of the Armiger Legion Turians. Great tool for survivability and as a bonus you some get additional damage. Sort of like a mix between a Survival Ops Pack and Adrenaline Rush. For this build, I take all shield bonuses because this is just like a refillable Ops Pack. The base duration is already pretty good, and the more the better. It's a real lifesaver, especially on Platinum when you're often forced out of cover and your shields take forever to recharge. In case you didn't know, Stim Packs count as grenades in the sense that using a Grenade Capacity Mod will give you extra Stim Packs. you're the only character using grenades in the game, then use these liberally. If there's another person running around taking grenades, then you can't tank as often. Either way, it's really awesome how much fire this guy can soak up with Stim Packs.

I use the standard Cryo Blast on this character. All debuff evolutions and radius to debuff more enemies. As Garrus himself once told me, "debuff all the things". Throwing a snowball at an enemy is just about as effective as charging into them headfirst, even if it's not as spectacular.

Skip Havoc Strike until they buff it more. It does give you a brief 50% damage reduction bonus, though, so it's not totally suicidal if you decide to spec into this power. What's cool about Havoc Strike is the synergy with Cryo Blast. It does 3x force to frozen enemies, so you can see how it could be really good for decimating lesser enemies. Also, using weapon synergy on top of the debuff is a very powerful combination. This is why I have high hopes for the future of the Havoc.

For the passive power, I take all weapon damage bonuses since this is a weapons build. Cooldown isn't  really an issue with this build as long as you don't drop into a negative penalty. And lastly I take all durability evolutions for Fitness. Tankiness is the Havoc's strong suit.

Thanks for reading everyone, and don't forget to calibrate your weapons.

-Grun7mas7er

Saturday, September 8, 2012

Turian Soldier: 200 Waves Edition

Hello everyone. I recently finished my 200 waves for the Turian Soldier, so here is an updated 200 waves guide. The Turian Soldier is still one of the best weapon characters in the game, and his skills are so versatile that he can literally carry any weapon in the game and make it better. I find his skill set best for assault rifles and SMGs, but that's just me. Specifically, I like the Typhoon, which is what I use for this build.

Turian Soldier (Typhoon)
Marksman: 4-firing rate, 5-headshots, 6-accuracy & firing rate
Concussive Shot: 4-force & damage, 5-recharge speed, 6-shredder
Proximity Mine: N/A*
Turian Veteran: 4-damage & stability, 5-headshots, 6-damage & stability
Fitness: 4-durability, 5-shield recharge, 6-fitness expert

*for lighter weapons, try skipping Concussive Shot and taking
Proximity Mine: 4-radius, 5-damage taken, 6-recharge speed

For the Typhoon, I recommend taking the magazine upgrade. The other mod depends on the enemy. Against Cerberus, try AP ammo and high caliber barrel. Against Geth, try high velocity barrel and Disruptor ammo. Against Reapers/Collectors, try Warp ammo with high velocity barrel. These are not prescriptive, so try out different combinations against different defense types.

You should tailor this build to suit the weapon that you have. For those of you new to the Turian Soldier who have no idea what weapon to choose, here is a list of preferred weapons and mods:
Assault Rifles (most work well with mag upgrade and extended barrel)
Typhoon
Revenant
Saber
Pistols (mag upgrade, heavy barrel)
Eagle
Talon
Scorpion
Shotguns (smart choke, high-velocity barrel)
Claymore
N7 Piranha
Geth Plasma Shotgun & Graal (spare thermal clip, high caliber barrel)
SMGs (mag upgrade and/or heat sink, high-velocity barrel)
Hurricane
Tempest/Locust
Sniper Rifles (spare thermal clip or piercing mod, high-caliber barrel)
Black Widow
Indra
Krysae (haven't tried this personally, but seems like rate of fire boost and recoil reduction would be good)

Generally, I spec Marksman for rate of fire and headshots because higher rof equals better DPS, better DPS means taking down enemies faster. The additional headshot bonus works well, too. Few weapons would benefit more from accuracy than rate of fire. Also, learn to reload cancel, which is basically canceling part of the reload animation, allowing you to get back to shooting things faster.

The best way I can explain this for console players is that once you see your magazine count go back to full, press any button normally reserved for an action. Doing this will cancel the reload animation. On Xbox, popular buttons are the A and Y button. However, these can cause you to dodge, take cover, or use a power that you don't want to. The A button works best on characters that don't have a dodge move, such as the Turian Soldier. You can also use the right or left bumper if they are assigned to a power. I prefer these buttons since I don't have to take my thumb off the aiming thumbstick.

If that didn't make sense, here is a video tutorial by Caineghis.


Concussive Shot is great for heavy weapon builds since it has a fast recharge speed. It's also useful against Phantoms, since it has a damage bonus against barriers and the shredder evolution allows you to target them when they're cloaked. Even if you miss, they'll either dodge or block it, giving you a chance to line up a shot.

Proximity Mine is great for light weapon builds since the recharge speed is pretty hefty. It's great for debuffing bosses as well as for limited crowd control. Whatever power you choose, it's still only secondary to your weapon.

The non-Armiger Legion Turian passives are amazing. You get 55% recoil reduction, 37.5% weapon damage bonus, and 30% headshot bonus. Best weapon passives in the game.

Fitness is self-explanatory. All shields and health. You're still fairly squishy, mostly as a result of pitiful mobility. This Turian doesn't have a dodge or jetpacks, so I recommend using an Adrenaline Module for better mobility. Hopefully you'll get sync-killed less that way.

That's really all that I can think of for this guide. Mostly it's about learning to use your weapon, and what mods and ammo types to use. Thanks for reading, and hopefully this was helpful to some people.

-Grun7mas7er

For those interested, here is a video guide by Stardusk.

Friday, August 3, 2012

N7 Destroyer Master Level + Typhoon & PPR Discussion

Greetings everyone. This is a (long overdo) updated guide to the N7 Destroyer. The reason I've been hesitant to update this guide was because the nerfs he got were just overkill. I was so disgruntled by them that I just put the Destroyer on the shelf altogether for a while. He was just a shadow of his former self. But some time later, as I was perusing the BSN forums, I came across one thread that made an attempt to eliminate any doubts about the Typhoon/Destroyer. Though I wasn't totally convinced, I though it fair to give the combo another chance.

I did. I have not changed my opinion that the Typhoon and Destroyer nerfs together rendered the build half as effective as before. But to be fair, the Destroyer remains a very good soldier if not necessarily a great one. The problem stems from mobility issues. The Destroyer is comparable to a Krogan. He's slower and has less health, but his weapon capabilities are much greater and he doesn't stagger with Devastator Mode on. The idea was to make this guy a human turret: more or less immobile but capable of putting heavy fire down range.

I propose that this characteristic be build upon and then we can end this balance debate once and for all. The Destroyer/Typhoon needs to be buffed one way or another. Some have suggested increasing the multiplier from 1.5x to 1.75x, which sounds reasonable. Another thing that could improve the "flavor", or the character playstyle, would be to make the Typhoon provide additional damage reduction from cover like it implies in the description (though technically it only says the face shield is to "protect the shooter from headshots"). This would reward players for playing to the supposed strengths of the Typhoon Destroyer: staying behind cover and essentially being a turret gunner. Even though he doesn't stagger and the Typhoon gets recoil and accuracy bonuses while in cover, it's not enough. The Destroyer simply isn't tanky enough to sit in cover and sustain fire when facing multiple enemies. The additional damage reduction in cover would solve this.

As it is now, you're generally better off using a Particle Rifle and soft cover playstyle because a) the PPR is perfectly accurate with no recoil, and b) you're generally less exposed in soft cover, making hard cover unnecessary. I say 'generally' because they each have their own strengths/weaknesses, and so I'm posting two builds for the time being.

Typhoon N7 Destroyer
Devastator Mode: 4-weapon accuracy, 5-rate of fire, 6-damage bonus
Hawk Missile Launcher: N/A
Multi-Frag Grenade: 4-force & damage, 5-force & damage, 6-grenade count
T5-V Battlesuit: 4-weapon damage, 5-headshots, 6-weapon damage
T5-V Internal Systems: 4-durability, 5-shield recharge, 6-fitness expert

PPR N7 Destroyer
Devastator Mode: 4-shield recharge, 5-magazine size, 6-damage bonus
(same)

First, let's cover the weapons and ammo mods because they are paramount to an effective build. The Typhoon has an inherent armor-piercing capability of 25cm, as well as a 50% multiplier against armor, shields, and barriers. One might be misled to think that armor-piercing ammo or mods are redundant, when in fact they are critical to effective 'phooning. Let's put it this way: the Typhoon does relatively low damage per bullet, and armor reduces the damage of each bullet by a set amount. Even with the 50% multiplier, the damage is pitiful against armor.

There are a few ways to set up your Typhoon or PPR, but always take the magazine upgrade. Against Cerberus, try extended barrel with armor piercing rounds. For heavily shielded enemies like Geth, I recommend the high velocity barrel with Disruptor or Phasic rounds (I like to save my Phasic rounds for sniping, though). Finally for Reapers and Collectors, try the high velocity barrel with Warp rounds to strip their barriers. Of course these are not prescriptive, so feel free to mix and match as you see fit.

Depending on which weapon you prefer, you're going to change Devastator Mode around to suit that weapon. If you have a high level PPR, then use that. If you don't, then the Typhoon may work better. If you have neither of these weapons, then the Revenant is the next best thing (spec for accuracy, rate of fire, and the same mods as you would for the other two). The Typhoon benefits greatly from the accuracy bonus, whereas the PPR doesn't. Also, rate of fire is a waste on the PPR because it doesn't make it ramp up faster -- it only wastes more ammo before it ramps up, meaning less superbeam time. When in doubt, you can't go wrong with magazine size.

Marshmallow launcher. They buffed it, so if you like you may opt for them and skip multi-frags. They do have great synergy with sustained fire weapons, but I personally have only used them once or twice. I can't really comment on what's the best way to spec them. But I can comment on the best way to not spec them: don't spec them.

Multi-frag grenades. Damage damage damage. Need I say more? It's great for crowd control, but you probably won't end up using them much, which is why I say that it's fine if you prefer Marshmallow launcher.

For Battlesuit Galactica, go for all weapon damage. I admit it would be interesting to see a caster build with all missiles and power damage but that's for another day. Then Internal Systems for all shields/health to make you as durable as a YMIR mech from ME2 (you wish). Ah, ME2 on insanity. Those were the good ol' days. Atlases are way easier than YMIR mechs, by the way. On insanity they could survive a direct blast from an M-920 CAIN. Atlases on platinum die from a cobra missile. That's weak.

Thanks for reading everyone. Like, subscribe, blah blah blah... and above all, stay classy folks.

- Grun7mas7er

Oh, and just for some perspective, here is a video of the Typhoon Destroyer pre-nerf on Platinum by Sp3c7eR.


And here is a video of the Typhoon Destroyer post-nerf on Gold, by Feneckus.