Wednesday, January 16, 2013

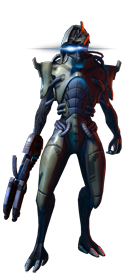
ME3 Character Guide: Batarian Slasher Adept

What's up gamers? It's been a while since I posted a guide for the Retaliation characters. I haven't had much time to test out the last few so I'm just posting some first impressions for them and posting any tips that I've come across in my travels. I hope to update it to a full 200 Waves guide later on, but for now this will have to do. Also I'll take this opportunity to make a public service announcement. I'm going to be less active on the blog for a while as spring semester begins. I'll try to keep up with new content but I can't make any promises. Anyway, let's look at the build.

Batarian Slasher
Warp: 4-detonate, 5-expose, 6-pierce
Lash: N/A
Cluster Grenades: 4-damage & force, 5-damage combo, 6-shrapnel
Batarian Enforcer: 4-weapon damage, 5-headshots, 6-damage & ammo
Fitness: 4-durability, 5-shield recharge, 6-fitness expert

Definitely use Warp ammo on this build. Any target primed with a biotic power takes extra damage from Warp rounds, so this is going to give you a massive damage bonus.

Generally shotguns work well on Batarians, but especially so with this build because you will be working in close quarters. The Claymore is a classic because it is unrivaled in terms of damage per shot. The Wraith also does great damage. The reason you want damage per shot instead of damage per second is because you want to execute your combos as quickly as possible. This build isn't about sustained fire.

For just about any build, you're going to want the 'standard Warp'. That is, detonate, expose, and pierce. You get biotic explosions, a general debuff, and the armor debuff. Very useful on a weapon build.

Lash is an all or nothing power because you need shield penetration for higher difficulties. It's difficult to skip Lash since the Batarian cannot dodge and you need something to protect you from Phantoms and melee creatures in general. Since we're skipping Lash with this build, just be wary of Phantoms and keep your distance when possible.

Many players don't know the warning signs that a Phantom is primed for a sync-kill, so I'll go over what I know. A Phantom is primed for a sync-kill after her regular melee slash. This is when you want to keep your distance (unfortunately as a Batarian, there's not much you can do to get away but back up or shoot her). When she uses her palm cannon or tactical cloak, she is un-primed from her sync-kill. I'd have to double-check how her bubble shield affects her sync-kill but I think it also un-primes it. If you're cornered by a Phantom and don't have Lash, use Warp and blast her with your Claymore and hope for the best.

This build is about damage, damage, and more damage. When spec-ing Cluster Grenades we have to take into account different things like biotic priming and shrapnel. Damage & force for the first one is pretty obvious. Damage combo is skipped over too often because of poor description; the damage combo applies to all biotic-primed targets, not just lifted targets. I've read that only one shrapnel gets the damage bonus though, but it's still worth it. Then I take shrapnel because more grenades thrown equals more overall damage, assuming they all hit.

Looking at Batarian Enforcer, you may wonder why I take weapon damage and headshots if this is a power build. As you'll see later on, much of your damage will be from your weapon. Additionally, you're not using Warp and Cluster Grenades on everything, mostly hard targets. Your gun is still going to be your primary weapon for this build. For Fitness it's simply all health and shields to give you enough durability for close quarters combat. Voila.

-Grun7mas7er

Now that we've covered all the powers, let's look at the main combos for this build. You know what, I'm not even going to spoil it by explaining it. Just watch and learn. (Much thanks to Feneckus for the demonstration video, which pretty much inspired me to this whole build).


Also, check out Xcal's video guide.

Monday, January 14, 2013

Geth Infiltrator: 200 Waves Edition + Javelin Discussion

Hey everyone, Grun7mas7er (aka MACave11i, aka Grunt, aka Sorry for the confusing alias changes) here with yet another 200 Waves guide. Today I'd like to take it back to the classics. I present to you the most hated... most debated... most overrated character in ME3 multiplayer: the Geth Infiltrator! (Though as Legion would say, "Geth do not infiltrate.")


Javelin Geth Infiltrator
Tactical Cloak: 4-damage, 5-power recharge, 6-sniper damage
Proximity Mine: 4-radius, 5-damage taken*
Hunter Mode: 4-power recharge, 5-rate of fire, 6-speed & vision
Network AI: 4-weapon damage, 5-headshots, 6-weapon damage
Advanced Hardware: 3*

I recommend using Phasic ammo for Cerberus/Geth and Warp rounds for Reapers/Collectors. If you like wall-hacking, go for Drill rounds.

The GI is one of the most powerful characters (if not the most powerful) in terms of sheer damage output. Pretty much any weapon will work on this character, but he is undoubtedly the best character to use with the Javelin. This is why I'm doing this guide. I've been hesitating to post this because the GI is a very straightforward character that most people know how to play. But I'm going to focus on the Javelin itself for part of this guide.

I've set up Tactical Cloak for damage. Nothing special here. I should mention that the sniper damage evolution is multiplicative, meaning that the more sniper damage bonuses you equip, the greater the sniper damage evolution bonus. Go to the class builder and switch TC and Hunter Mode on and off. Observe how the Tactical Cloak 6 damage bonus changes.

If you're super pro you can take Proximity Mine instead of Fitness. Proximity Mine gives you good crowd control and can be used to debuff bosses so you can do even more damage with your Javelin. I prefer some points in Advanced Hardware because of the shield recharge bonuses, but it's up to you to decide your play style. I would recommend radius, damage taken, then damage.

For Hunter Mode on the Javelin build, I use power recharge because it just makes more sense. The Javelin is already accurate, but it's quite heavy. Other builds, I usually take accuracy. Some of you might be wondering why I take rate of fire if the Javelin is a one-shot weapon. Rof bonuses actually improve your reload speed as well, which is definitely useful on single-shot weapons like the Javelin. Finally, I've switched from damage to speed & vision. I weighed the options a little more and decided that the added tactical awareness, wall hacking, and movement speed are better than a meager 10% damage bonus.

Javelin GI boss-killing by Feneckus.


Network AI is all about weapon damage. No surprises. The important part is the Geth weapon damage bonus, which is multiplicative like the TC6 damage bonus. Then I put a few points into Hardware for some durability and shield regeneration. 


Now let's talk about the Javelin a little bit. I've practiced with the Javelin to the point that I can reliably get 20 headshot medals. For a console scrub, I think that's pretty decent. By the way, I'm mainly addressing fellow console players since I can't really relate to mouse-and-keyboard. Anyway, console players have to deal with the aim assist function. This can be both a gift and a curse. Sometimes you'll scope down on target and it will lock onto a Swarmer. Other times it compensates for the lack of precision of a thumbstick.

I've found the aim assist to be most useful when aiming at easily differentiable targets, such as a couple of regular troopers. It's most detrimental when aiming at clusters of enemies, such as enemies among Swarmers, or a cluster of enemies surrounding an Atlas. You will tend to lock onto the Swarmers or the bulky Atlas.

One technique is to position yourself such that your targets move straight toward you, such as down a hallway. This is because aim assist snaps to a given target at one instant in time. If the target is moving  sideways from you, the aim assist snaps to where they were not where they are, assuming that they continue to move sideways. It is much harder to track horizontally because you are relying on your control stick to aim. However, if the target is moving toward you, they will be lined up for a shot even as they continue to move toward you. All you have to do now is adjust for vertical aim if you wish to get a headshot. Hopefully this wasn't too confusing.

That's how to use aim assist to your advantage. Now let's talk about Javelin mechanics. Most people initially have trouble with the Javelin firing delay. The way around this is to start holding down the trigger before even scoping in, essentially quick-scoping while also using the aim-assist technique. The sequence goes like this:
1. From the hip, keep your crosshair over the target.
2. Start holding down the trigger.
3. Aim down sights as the bullet leaves the barrel, letting aim-assist snap to the target (hopefully).

Obviously this is easier said than done since the whole sequence takes place in less than a second. Hosting helps with this lag-sensitive playstyle, but personally, I don't have the reaction time to release the trigger unless I already know I'm way off aim, so you can generally disregard that part unless you're a robot.

The Javelin's scope can inherently see enemies through walls, making it great for wall-hacking. When the enemy is highlighted as bright purple, that means that the shot can reach them through cover.

Also, learn to reload cancel if you don't already know. On console, use the shoulder button used for Proximity Mine instead of the Tactical Cloak button. That way you don't have to take your thumb off the aiming stick.

And that about wraps up the Javelin GI guide. I hope that this guide is somewhat helpful and not too confusing for all the aspiring Jav snipers out there. Thanks for reading everyone.

-Grun7mas7er

Wednesday, January 9, 2013

Vorcha Soldier: 200 Waves Edition

Greetings, fellow Mass Effect enthusiasts. Today I would like to present another edition of my 200 Waves guides, the awesome interchangeable Vorcha! To be honest, I actually did my 200 waves with the Vorcha Sentinel for various reasons, but I used a build that can be done exactly the same with the Soldier. I prefer this build on the Soldier rather than the Sentinel because Carnage has proven too slow in my experiments with it, and so it's an easy power to skip over. So without further ado, the build:

Vorcha Soldier
Bloodlust: 4-health regeneration, 5-weapon damage, 6-health regeneration
Flamer: 4-damage, 5-damage, 6-armor damage
Carnage: N/A
Vorcha Resilience: 4-damage & capacity, 5-power damage, 6-weapon damage
Fitness: 4-durability, 5-shield recharge, 6-fitness expert

Yeah, I know. "Reegar and Flamer are for scrubs" blah blah blah. Well I'm of the opinion that when Bioware gave us the Vorcha and Reegar in the same DLC they were aware of the synergy between them. Why not admit to this synergy and use it to your advantage?

For your ammo power, both Incendiary and Armor-Piercing mods work well on the Reegar, compensating for its weakness against armor (if you plan on using AP rounds, you can take off the high-velocity barrel). You can even use Cryo to mix it up, but it's more useful for supporting your team than actually dealing damage. The Reegar tends to panic smaller enemies anyway, so freezing them is almost redundant. Also, if you're using the High-Velocity Barrel, you don't need the armor-weakening as much, though your teammates can still benefit from it. The most useful part, in my opinion, is the slowing effect. Say there's a Brute in front of you. Hit him with Cryo ammo and flame him while backing away. You can get more burning damage done before you have to dodge if he's slowed down. Don't use Disruptor or Phasic ammo on the Reegar, it's utterly redundant.

As far as weapon synergy goes, I think the Reegar is the best choice. If you are boycotting the Reegar, which is understandable, then use a good infantry-killing weapon. Vorcha are scavengers, after all, and you have to be opportunistic. No really. Preying on the weak means quick kills. Quick kills keep your Bloodlust charged up, which in turn keeps you alive. The Claymore is good for one-shotting mooks. The Graal is also a classic on this character. I don't see people using the Piranha on this guy much, but it's more or less like the Reegar. Other than that, I've elected to take a sidearm for ranged combat if necessary. I had the misfortune of playing a game on Firebase Reactor and the enemies got stuck in one of the spawns above the map and I couldn't even throw rocks at them. It doesn't have to be powerful, just lightweight. If all goes well you'll never have to use it.

Bloodlust is the Vorcha's signature power and skipping it is blasphemous. As you can see, I take all health regeneration evolutions. The Vorcha isn't exactly tanky. He can't sit in front of a Cerberus Turret and laugh like a Kroguard can. That said, he has much greater endurance than the average character and can survive repeated close-quarters and close-call encounters. Improving your health regeneration lets you get back into the fight much faster -- almost immediately if you have Bloodlust charged up. And besides, if you're playing on higher difficulties, why would you take melee damage? Then I take weapon damage because this is primarily a weapons build and the stacking damage adds up quickly.

You have shielded enemies covered with the Reegar, but what about armored enemies? You have Flamer for that. I opted for all damage and then armor damage, which boosts your armor damage multiplier from 1.5x to 2.25x, meaning you'll do massive damage to armored targets with all your damage bonuses. You can opt for the range evolution if you prefer. There's a minor exploit/trick with the Reegar and Flamer. Not the one where you can fire both at once (Bioware patched that), but if you activate Flamer while firing the Reegar, you can use Flamer with normal walking speed, as apposed to being slowed to a crawl. The added mobility is useful.

Fire explosions are all well and good, but the thing is that Carnage recharges too slowly with Bloodlust on. I find it to be inefficient, but it can be done.

For Vorcha Resilience, I take all power damage to give Flamer a boost. The extra capacity helps a little too. Then I take weapon damage because cooldown is not too much of an issue for Flamer. You will be better served by the additional damage. For Fitness, I take the entire bottom row. The more health, the better. Though your shields are secondary, they still give you a shield gate, which can negate the greater part of massive damage attacks. On that note, don't waste a Cyclonic Modulator on the Vorcha. You'll be better served by a Power Amplifier, Adrenaline Module, or even Shield Power Cells.

That's really all there is to the build. Reegar for shields/barriers, Flamer for armor. Bring a teammate who can trigger Fire Explosions. Have fun with the build, stay tuned for more in the future. Enjoy the fireworks.

-Grun7mas7er

Monday, January 7, 2013

Krogan Vanguard: 200 Waves Edition

What's up everyone? Welcome to yet another 200 Waves guide. This time I'm covering the Kroguard. Now this guide is going to be a little weird because I'm proposing a "non-optimal" build for this character. Why's that, you ask? While I was playing 200 waves for this guy, which is a repetitive task in itself, I came to the realization that all I was really doing was charging and shooting or charging and following with a heavy melee... repeatedly. This was with the conventional "optimal" build. You know, the invincible one that skips Carnage.
I decided for myself that I wanted a more dynamic character. I thought of the possibilities when I recalled Urdnot Wrex from single player. In the first Mass Effect, Wrex was the most badass Krogan mercenary in the entire galaxy (then he got soft and was replaced by Grunt, who starred in one of my favorite cutscenes in ME3). He reminded me a little of Canderous from Knights of the Old Republic, but I digress. Anyway, Wrex had Barrier, Carnage, and a shotgun. No Biotic Charge. Now I do like to role-play in ME3 multiplayer from time to time and I thought that this would be a cool build to play. Unfortunately, we can't use Wrex's armor... :(
Krogan Battlemaster
Biotic Charge: N/A
Carnage: 4-damage, 5-incapacitate, 6-armor damage
Barrier: 4-blast effect, 5-power synergy, 6-durability*
Krogan Battlemaster: 4-damage & capacity, 5-power damage, 6-weapon damage*
Rage: 4-durability, 5-shield recharge, 6-fitness expert

*Depending on your weapon, you may consider altering your evolutions to improve power cooldown. I would rather sacrifice some durability than some weapon damage, but this is entirely based on your preferences.

I recommend using Incendiary Ammo for this character, since you can trigger Fire Explosions with Carnage. And who doesn't like Fire Explosions?

In terms of weapons, I like to use shotguns on Krogan, partly out of roleplaying sensibility. I believe the Wraith strikes the perfect balance between weight, damage, and range, but seeing as not everyone has a high-level Wraith, the Piranha is a good substitute as it satisfies the weight and damage requisites. If you prefer, you can use the Graal or Geth Plasma Shotgun, but you may want to compensate for the additional weight.

Have you ever wanted to play a charge-less Vanguard? Well this is it, and it makes the most sense out of them all. Who needs Biotic Charge on a Krogan? Meh. Skip it.

Carnage is just a classic Krogan power. It's great for taking out those hard armored targets and it blasts smaller targets to pieces. I take damage over radius. Then I take incapacitate, which is nice for crowd control. It's useful being able to knock smaller enemies off their feet. And finally I take armor damage, which is going to be more useful on higher difficulties. Carnage is inherently weak against shields/barriers, but does massive damage to armored targets. Pro tip:
1. Shoot enemy with Incendiary Ammo.
2. Shoot enemy with Carnage.
3. ???
4. Profit.

This character actually has surprisingly good synergy even without Biotic Charge thanks to Barrier. It compensates for the lack of a dodge move, it boosts your power damage, and it improves your already good durability. I often forget about the utility of Barrier explosion on the Biotic Charge build as it's simply not necessary. Without Biotic Charge, all of a sudden you realize the necessity of this power -- it is great for getting melee creatures out of your face. As a Krogan, if you get swarmed by Husks, Abominations, or Phantoms, you can easily get locked into a grab animation because you can't dodge. You don't want that. Barrier explosion is your solution, as it will stagger all nearby enemies and leave a single unprotected enemy dangling in midair. The best part is that it does extra damage to biotic barriers. Useful against Phantoms.

Additionally, the power synergy evolution boosts power damage even further, improving Carnage and Barrier explosion. Finally, the last evolution is preferential, based on your cooldown requirements. I prefer a cooldown under 4 seconds for Carnage with Barrier on. Use Narida's class builder to figure out your own cooldown needs.

I take all power damage evolutions for Krogan Battlemaster, since this is somewhat of a caster build. Then I take weapon damage for better damage output, since weapons are half of the equation. For Rage? All durability, no contest there. If you want a melee build, take Biotic Charge. You scrub.

Well, that's about it for the build. Thanks for reading and stay tuned for more guides.

-Grun7mas7er

Ok, I've got to give credit to Stardusk, the first person who advocated a similar build for the Kroguard (as far as I know). It's a little dated, so I gave it an upgrade of sorts. You can check out his video below.


Saturday, January 5, 2013

Batarian Soldier: 200 Waves Edition

Greetings everyone, and welcome to another edition of my 200 Waves guides. Today is the Batarian Soldier, one of the old characters that still holds up to the new ones. It's not a new build, but it gets the job done. Then there's always the melee build, but now that we have the Broguard (Batarian Vanguard) it's redundant if not inferior. As such, I opted for the grenadier build.

Batarian Soldier
Ballistic Blades: 4-cone spread, 5-range, 6-explosive blades
Blade Armor: 3
Inferno grenade: 4-damage, 5-damage, 6-radius & shrapnel
Batarian Enforcer: 4-damage & capacity, 5-power damage, 6-damage & ammo
Fitness: 4-durability, 5-shield recharge

I recommend a medium weight, high-damage weapon for bosses, as this character can take on pretty much everything else from basic troopers to Phantoms just by using his powers. Such weapons include the Harrier, Piranha, Wraith, and Hurricane. Some weapons like the Raider, Claymore, Geth Plasma Shotgun, Graal, and Reegar work but are a little heavy. Consider replacing Blade Armor with rank 6 of Fitness if you want a better cooldown.

Your ammo mod really depends on what enemy you are facing, as you can't trigger your own tech explosions with this character (as far as I'm aware). He's excellent for priming fire explosions, though.

Blades and grenades: the meat and (hot) potatoes of this build. This combo will annihilate crowds, save for boss-level enemies. I spec Ballistic Blades for maximum crowd control. The important evolution is explosive blades, which lets you double-stagger enemies. This is very useful against Phantoms and such, allowing you to hit them with your Inferno Grenades. Basically, stun lock all the things.

The 25% DR from Blade Armor brings you to approximately 1600/1600. Cooldown isn't a big deal with this character, but you still don't want your Ballistic Blades to take too long. As I said, adjust your build to achieve a cooldown that meets your needs.

The grenadier playstyle of this build brings the Krogan Soldier to mind, and the strategy is similar. Use Inferno Grenades against groups of lesser enemies as well as armored targets. If you don't have a high-level grenade capacity mod, you may want to take extra grenades for evolution 5 instead. Otherwise, take all damage evolutions to deal massive damage over time. Evolution 6 is not prescriptive, I just prefer radius and shrapnel for better crowd control. You're more likely to get killstreak medals if you can hit more enemies at once. Try staggering an entire enemy spawn with Ballistic Blades and then lobbing an Inferno Grenade in the middle of them.

For Batarian Enforcer, I take all power damage bonuses and weapon damage, which is pretty typical for any caster/grenadier build. Finally, I take durability and shield recharge in Fitness. If you can deal with the longer cooldown, taking 3 ranks in Blade Armor for 25% DR is better than 30% health and shields. I find that 15% shield recharge delay is superior to and additional 5% DR from Blade Armor, though that is an option. Remember that shield recharge delay varies by difficulty, so this evolution is somewhat more useful on Platinum.

I think that's about it for the build. I know the Batarian Soldier is old, I'm a little late to the party, etc etc. Irrelevant, as long as some people get some use from this guide. Thanks for reading everyone. I know it's been a while since I've made a new post. I've mostly been editing old ones and perfecting some of the 200 Wave guides. Plus Bioware is on vacation so there's not much in the way of updates. I've been on vacation as well, as I'm sure many of you have, and so I'm just getting back to my day-to-day schedule. Anyway, I hope you all had a happy new year.

-Grun7mas7er

Also, check out RedJohn's Guide to the Batarian Soldier on BSN. He's sort of the resident Batarian Soldier expert. You should listen to him, not me.

Thursday, December 20, 2012

Operation: PROPHECY

http://blog.bioware.com/2012/12/20/operation-prophecy/


OPERATION: PROPHECY


Operation: PROPHECY (December 21st-23rd)
Event Description:
Our successes on Earth have given us the capability to land materiel in several war zones. However, in order to conceal shipments to the resistance, each delivery needs corresponding strikes on Reaper targets to create a screening distraction. The operations to deliberately gain Reaper attention are extremely high-risk and will require increased numbers to spread thin Reaper reaction forces. For this mission, N7 commanders, wherever possible, will recruit and command supplemental volunteer units: recent graduates of our N7 program and soldiers who bring experience from other branches.
Challenge Goal 1: Extract once on each Earth map (London, Vancouver, and Rio).
Challenge Goal 2: Score 100,000 cumulative points against Reaper enemies.
Challenges can be completed at any difficulty.
Completion of both goals awards the player a Commendation Pack.
Completion of both goals also awards the player a banner, “Hero of the Last Days.”


[Bioware surprised us by starting the operation a day early]
Happy holidays!

-MACave11i

Tuesday, December 18, 2012

December 18th Balance Changes

Happy holidays, all!

December 18th

----------------------------------------------------------------------------
December 18, 2012
----------------------------------------------------------------------------

There will be no balance updates for the next 3 weeks due to the Christmas holidays

Two new packs added to the store:
- Reserves Pack - for players who want character unlocks and upgrades
- Arsenal Pack - for players who want weapon unlocks and upgrades

Unlocking Volus Protector Vanguard and challenge
Unlocking Batarian Slasher Adept and challenge
Unlocking Drell Assassin Infiltrator and challenge

All hazard maps are now unlocked for the Christmas holidays

Acolyte Pistol
- Reverting pistol to original state before the attempted rocket glitch fix since the change
did not curb the use of the glitch

Sabotage Power
- Base cooldown decreased from 14 to 10 seconds
- Base backfire damage decreased 300 to 250

PSA: I anticipate that I will post and/or update several guides this week and over the holidays. Hopefully these will include the new characters, but it's too early to say for sure. Stay tuned, and thanks for reading.

-MACave11i

Thursday, December 13, 2012

Operation: ALAMO

http://blog.bioware.com/2012/12/13/operation-alamo/


Operation: ALAMO (Dec 14th-16th)
Event Description: The Reapers are taking advantage of our forces being spread thin and are making a push for Menae. Alliance Intelligence predicts that the Reapers are luring us into committing large-scale defenses to the moon that they will wipe out. Our counter-strategy is to insert small, stealthy units to conduct disruptive offensives and hold the firebase during their hopefully weakened attacks.
Team Goal: Earn the “Survived 5 Waves” medal on the Firebase Condor map at any difficulty. Extraction not required.
Reward: Commendation Pack

Tuesday, December 11, 2012

First Impressions: Turian Saboteur Engineer

So I tried out the Saboteur today. Right now I don't have enough experience to make a build or a complete guide yet. I didn't have a lot of time to play today, so these are just my first impressions.

For my initial build, I took all powers, no fitness, as I sometimes do with new characters. I mainly wanted to test the synergy between his powers. I found some decent combos unintentionally, but for the most part I think that the Saboteur will be a combat engineer. That is, he will be using powers more for utility than for damage. Though I specced my powers for damage, I found that my gun was doing most of the work. Turians are weapon specialists, after all.

I took the shock evolution for Sentry Turret. I found this was mostly killing Swarmers and stunning Husks. Not a big deal, but I think it stuns most other enemies, including Phantoms. Again, not sure about this, I'll verify it in when I finish the guide. Would then take AP ammo and flamethrower evolutions.

For Homing Grenades, I took damage and max grenades. I had intended on taking armor damage but didn't have enough points as I had recently promoted. This would have been useful for quickly taking down armored targets. Also, I'm probably going to go with fire damage.

One unintentional combo I found was to launch a Homing Grenade at a group of enemies and then use Sabotage to stun them all in place. More often than not, the Homing Grenade hit multiple targets thanks to this.

For Sabotage, I took backfire and recharge speed. I didn't have the points to put into Tech Vulnerability. But apparently, this doesn't have much effect on the TSE anyway. Proof. To reiterate, Tech Vulnerability does not affect Homing Grenades, Sentry Turret, or TSE light melee. However, it does affect TSE heavy melee and tech combos (i.e. tech bursts, fire explosions, etc).

I didn't notice backfire all that much, but Sabotage is very effective against mid-tier enemies (Marauders, Centurions, Collector Captains, and obviously Geth). It staggers them when hit and shocks them when they fire their weapon.

I took all weapon & stability bonuses. I used the Piranha as a trial weapon because it does good damage, is useful in many situations, and benefits from stability bonuses. I used a low level cyclonic modulator and Shock Trooper V gear.

That's my brief first impression of the Saboteur. I'll get a full guide up later, hopefully in the near future. Thanks for reading. Stay tuned.

Update: Lord Narida added the Saboturian to the site. So here's the build:

Turian Saboteur
Sabotage: 4-backfire, 5-recharge speed, 6-tech vulnerability
Sentry Turret: 4-shock, 5-armor-piercing ammo, 6-flamethrower
Homing Grenade: 4-damage, 5-fire damage, 6-armor damage
Armiger Legion: 4-damage & capacity, 5-power damage, 6-damage & stability
Fitness: N/A

Think 'tech bursts and fire explosions' when playing this build. Sabotage + Homing Grenade = tech burst, plus the tech burst and the grenade do 50% more damage with the tech vulnerability evolution. Throw your Sentry Turret into groups of enemies to stun and flame them, then zap them with Sabotage, then launch a grenade at them. Bam. Fire explosions for everyone. For big bosses, zap them with Sabotage and launch a grenade at them. Use your gun as necessary. This combo works especially well against Primes and Atlases. Not as effective against Banshees and Praetorians. But that's why you carry a good gun.

I will continue to update this post as necessary.

-MACave11i

Sunday, December 9, 2012

Krogan Soldier: 200 Waves Edition

Hello esteemed readers. So I'm trying out a new thing where I make "200 Waves Edition" guides for characters after completing the 200 wave challenge with them (or approximately that many waves if there is no such challenge for the character). This way I have a very solid understanding of the character and how to play them effectively. It takes a little longer but I think that it will improve the quality of these guides. I do play the characters before making the guides of course, usually pretty extensively, but this way I have a greater sense of experience with the individual characters that I didn't have before the challenges were introduced. And of course I will continue to update old builds as time permits.

Krogan Soldier (Fire Explosions build)
Fortification: 4-durability, 5-power synergy
Carnage: 4-damage, 5-incapacitate, 6-armor damage*
Inferno Grenade: 4-damage, 5-damage, 6-radius & shrapnel
Krogan Berserker: 4-damage & capacity, 5-power damage, 6-weapon damage
Rage: 3*

*Alternatively, put 3 in Carnage and max out Rage.

Recommended weapons:
ARs: Falcon, Harrier
Shotguns: Geth Plasma, Wraith, Graal, Reegar, Piranha

Recommended ammo bonus: Incendiary, Disruptor (especially if against Geth)

Now I'll explain the build because when I first saw it I was a little skeptical. It does look a little strange on paper (A Krogan without maxed Fitness? This is blasphemy!!!). But I assure you it is quite good in actual gameplay. First, let's look at Fortification. Evolution 4 is obvious because this is not a melee build. Evolution 5 is obvious too, since this is a grenadier build, and grenades benefit from power damage bonuses. What's not so obvious is why we choose 3 ranks of Rage over evolution 6 durability. It's all about the math.

Using an approximate DR formula (since the real one is complicated):

Health/Shields with 40% damage reduction, no Rage
1250/1667
Health/Shields with 30% DR, 3 ranks of Rage
1446/1929
Health/Shields with 40% DR, no Rage, Cyclonic Mod IV
1250/4167
Health/Shields with 30% DR, 3 ranks of Rage, Cyclonic Mod IV
1446/4071

As you can see, the Krogan Soldier is more durable with 3 ranks in Rage over rank 6 of Fortification in all cases. So do yourself a favor and take this advice. Whether or not you take a Cyclonic Mod is up to you.

Since it was buffed, Carnage is reasonably good. When you take Fortification power synergy into account, Carnage does massive damage to armored targets. It's still quite weak against shielded targets, however. It can also incapacitate unprotected mooks, such as Husks,  which is quite useful. But these powers are just bonuses. The main purpose of Carnage on this build will be to trigger fire explosions from your Inferno Grenades. With this combo, you will be able to annihilate spawn points and a well-thrown grenade will net you a killstreak medal.

Your Inferno Grenades are your bread and Carnage is your butter. With the appropriate damage bonuses, you can make an entire spawn zone go up in flames, killing all but the toughest of enemies with a single grenade. Thanks to its inherent armor damage bonus, even Brutes and Scions don't stand a chance. With the massive damage over time potential (nearly 670 dps with the above build), the last thing you want is for a Phantom, Banshee, or Praetorian to cancel that damage with their space magic bubble. Generally this means that you don't want to use Carnage on them until the damage over time has finished.

For Krogan Berserker, I took all power damage bonuses and weapon damage at the end. You'll have great weight capacity and decent weapon damage bonuses. This is primarily a power-based build though, despite it being a soldier (and a Krogan one at that). Rage has been explained above.

That's about it for this build. Try it out and if you like it, I encourage you to check the 'like' box below. If you really like it, feel free to subscribe to future builds. Thanks for reading.

-Grun7mas7er

Here's a video guide by Stardusk, which I found very helpful and inspiring.